DIY Media Center extender
...or extension is more appropriate I guess, since there’s no active component in our über-budget solution.
click to enlarge
First things first. Since around two years there’s Windows Media Center 2005 and (mainly because I had to get to grips with it because of my dayjob) I’ve got such a setup since April 2004. And credit where credit’s due, it’s quite a solid solution and probably still the most feature-packed out-of-the-box livingroom-setup you can have. There’s tons of other solutions of course like Mac’s Front Row, but that one doesn’t include TV. Now of course, we’re heading quite quick to a world where all the TV we’ll be watching will be online and not through a tuner or such so the lack of TV-tuners in Front Row will be easily solved, through time that is… Anyway, when ‘normal’ TV is one of the features you need, there’s Windows Media Center and probably MythTV or other open-source projects. Now I promised myself to jump onto an open-source PVR-bandwagon as soon as I could but one of the things that prevents me from doing that is the linux-support for Soundstorm, or better, the lack there of. I’m way too fond of my Soundstorm to step back to two channels… ^_^
So… even though you probably would expect something else from a guy like me, Media Center it is, in my livingroom. Well, it does have it’s advantages, it doubles as my only Windows-testmachine by the means of remote desktop (this also works from my iBook by the way). So, this is the only Windows-machine in my home and I like it that way.
But, back to the subject. Media Centers and Extenders. On MCE you have the possibility to put extenders in other rooms in your home, to be able to view the content on your Media Center in the living room. This is all brilliant and such, but I’m not gonna buy a Xbox 360 just for that. Now there have been Media Center Extenders for Xbox (not 360) but as far as I know, they only exist for the American (NTSC)-market and not for Europe (PAL) (where I live). I could be wrong, but even then, I like to go cheaper than that…
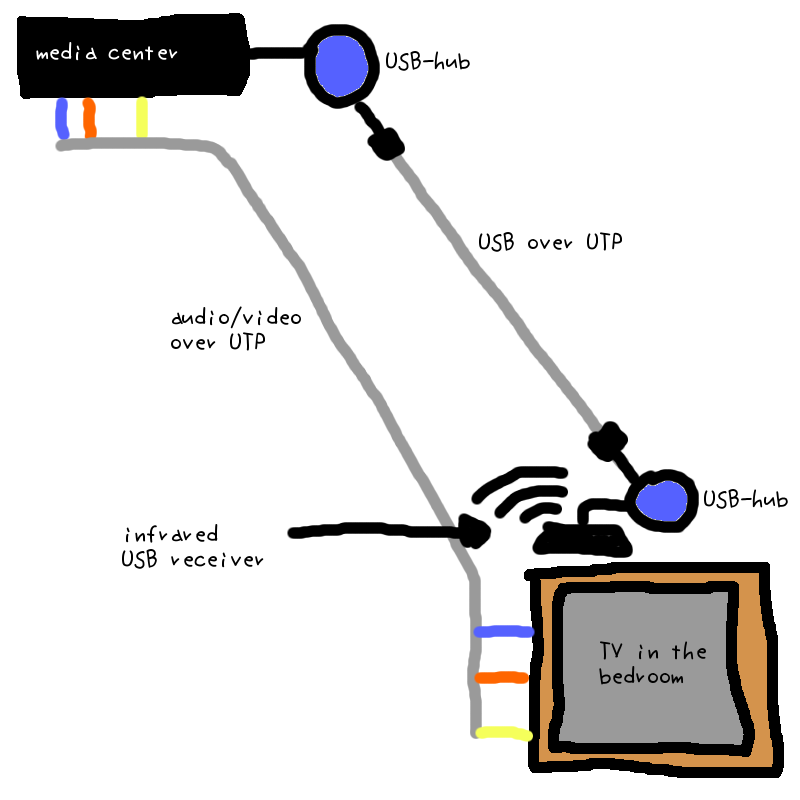
the plan
The plan is to extend all the signals over our beloved UTP-cable to another room, in my case, the bedroom.
click to enlarge
Our beloved UTP-cable…
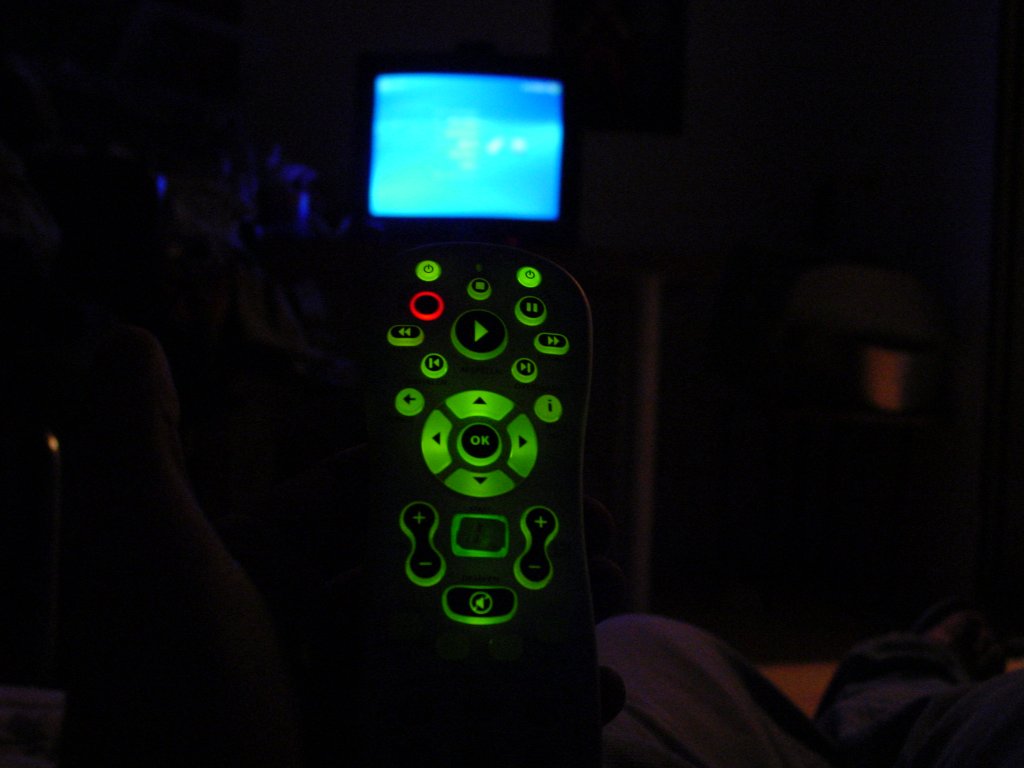
The signals we need to transport over UTP are the videosignal, the audiosignal (stereo) and USB. Now if we pull this off, we can use yet another MCE IR-receiver (aka the beanbag) in our other room, which we plug into the USB-outlet we’re gonna make and that way we’ll be able to control our Media Center from another room.
click to enlarge
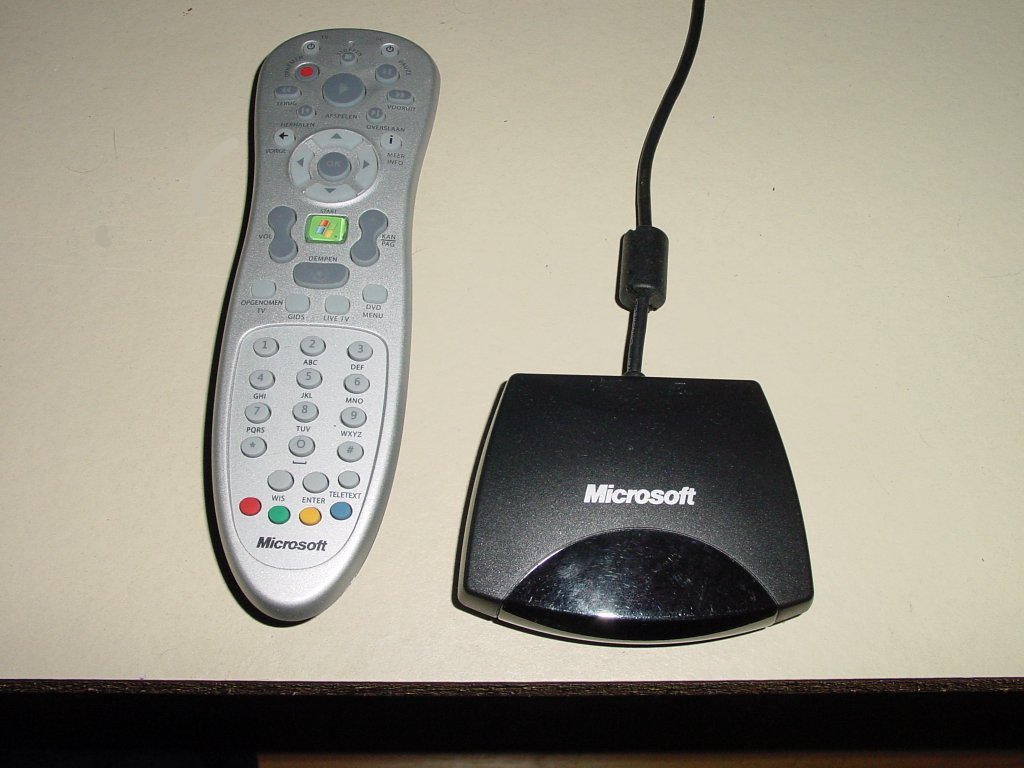
So, we’re gonna need an extra remote+IR-receiver. Now I’m not sure how hard it is to get these. Originally they were only to be sold with a complete Media Center PC, but I guess any vendor anno 2006 will sell these separately. If any of you has knowledge about this, please leave a comment.
click to enlarge
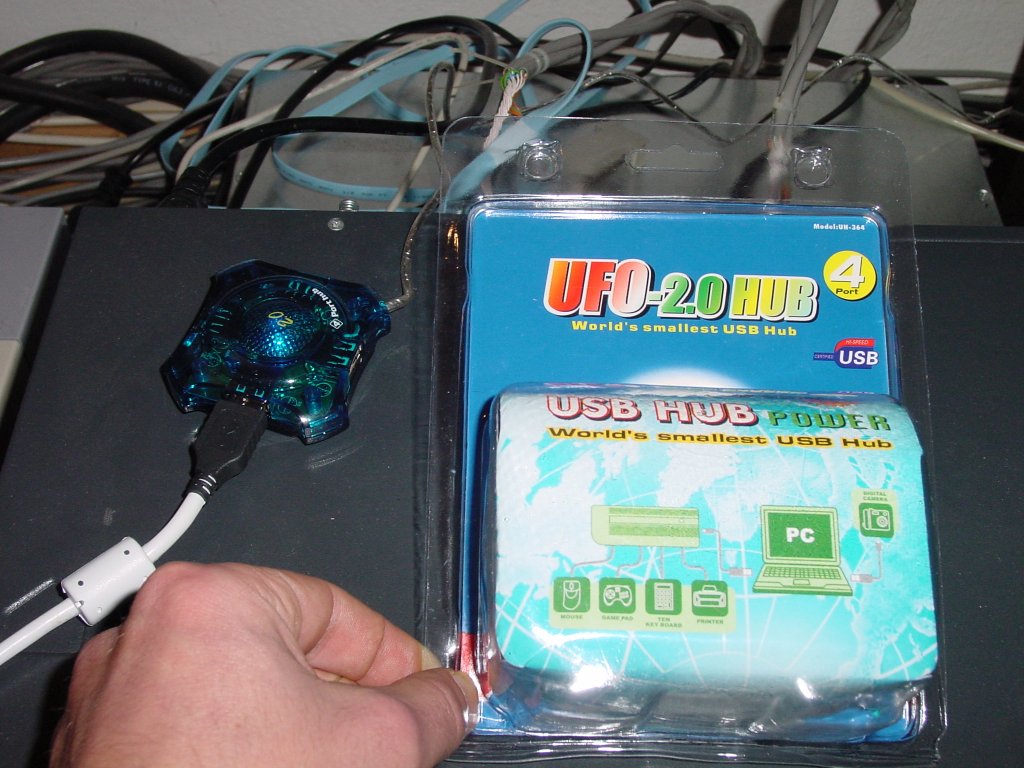
the cheapest hub I could find (and I got two of them)
Next to that, in the end, I needed two of the cheapest USB-hubs I could find.
click to enlarge
...to get to this schematic. (more on that later)
first of all:
audio/video over UTP
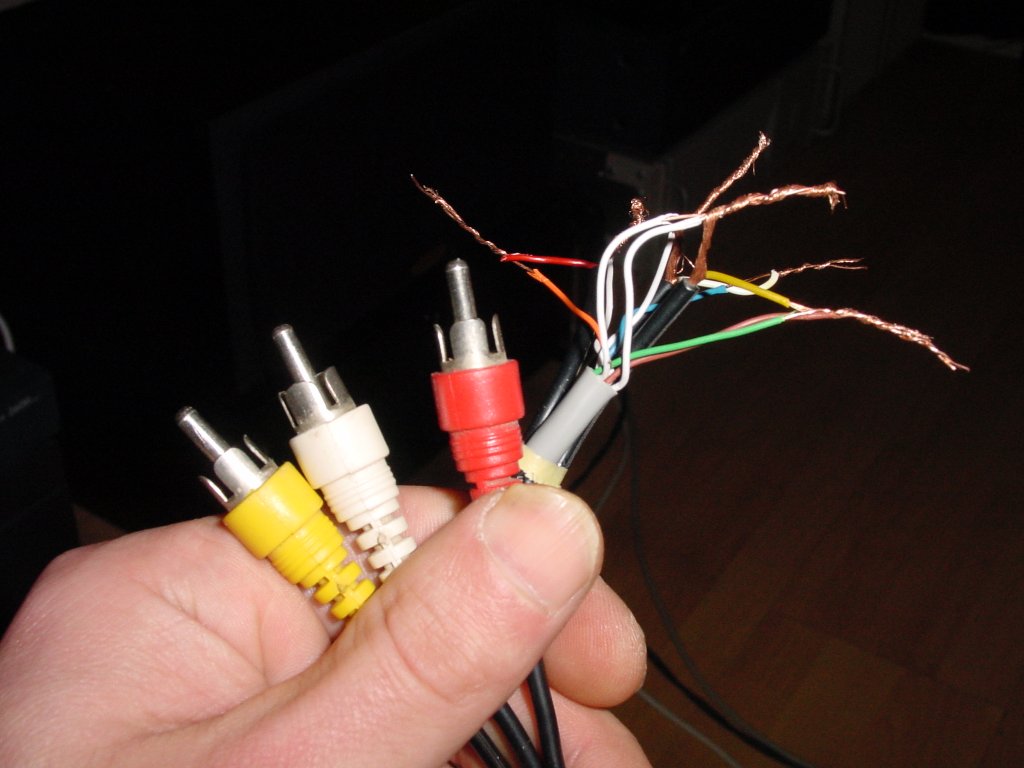
From my Media Center I took a composite videosignal, that’s the type of signal you can put into a SCART-cable to get a picture on your regular television. Almost any videocard out there will have a TV-out which, in the driversettings, you can ‘clone’ to have the same signal as your VGA/DVI-hooked up device. Now in my case it’s even different, but the main thing here is that we use the composite signal to run over UTP to the other room. Next to that, even though I use digital out from my motherboard to drive the stereo in the livingroom, I used the analog, two channel out from the motherboard to get a two-channel analog signal which I also could carry over UTP.
click to enlarge
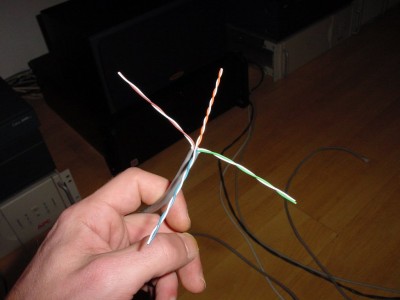
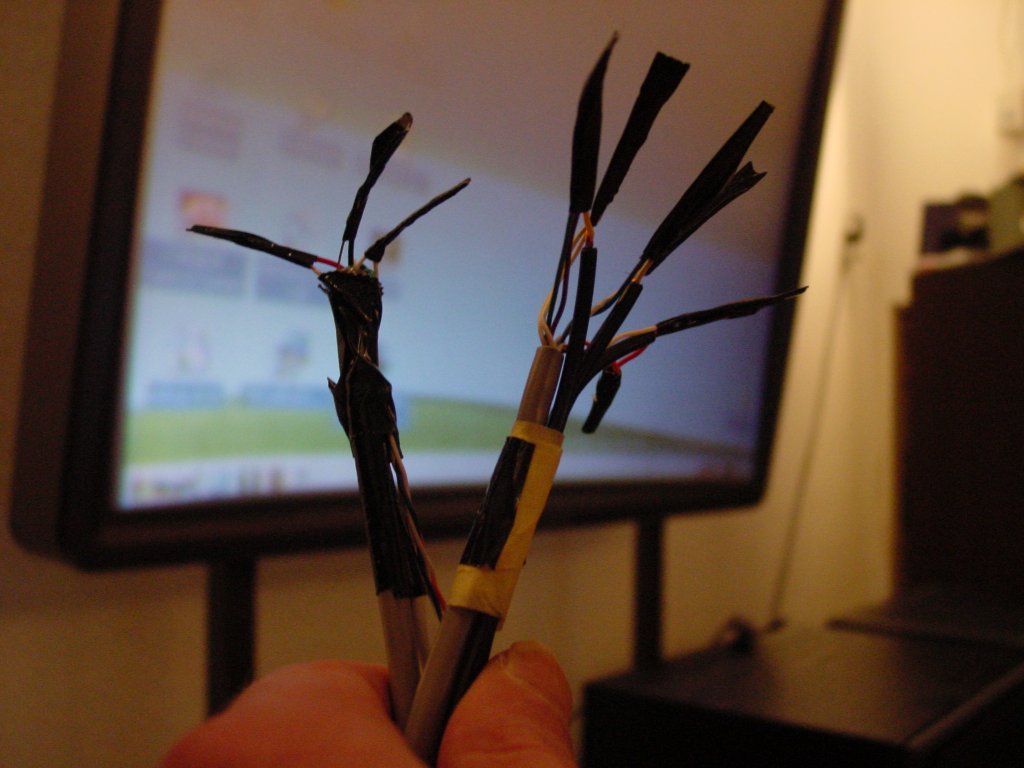
So, with these three signal (video/audio left/audio right) each with two wires (signal and ground), we need 3 pairs of a UTP-cable. In the end I used two pairs for the video, but I can’t tell the difference to be honest. Anyway, the way to connect them to UTP is not that hard. One pair in a UTP-cable consists of a color-wire and a color-white wire… So, for example you have an orange wire, with an orange/white-wire as one pair. You can put the signal part of the audio and videocables on the color-parts of the UTP and the ground of each signal on the color-white wire of the pair… (This sounds more difficult than it actually is).
click to enlarge
Just make sure you get the color-coding correct on both sides. And really, you should make that very sure. In my case that meant walking up and down the stairs a lot, which shows us you don’t need a Wii to keep fit…
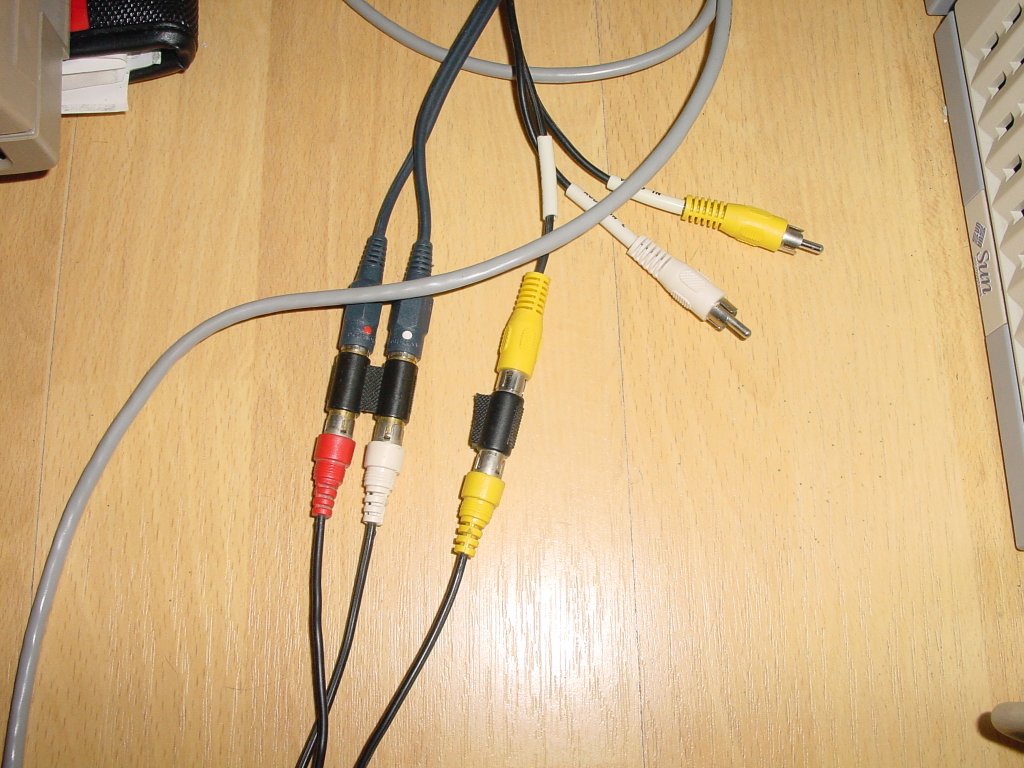
After you made sure everything is connected like it should, you can put the signals into a SCART-cable and connect that to the TV.
I was actually surprised on how good the quality remains of the videosignal. Now of course, composite video isn’t the best to begin with, but for a bedroom-TV it’s good enough imho. But, now we have the image+sound from our Media Center in the bedroom, but we need something to control our Media Center otherwise this is all not much of use… Let’s continue with:
USB over UTP
Now you may have noticed that we still have a pair left in the cable we just made… Originally it was my plan to use the one pair to extend USB or IR-signals or whatever over that one pair. But after a weekend of testing I stepped back and went for a 2 UTP-cable-setup in the end… I thought that I could pull it off by just running the USB-data-wires over UTP and put 5 volt on it by the means of a powered hub on both sides. But I’m not sure why, but that didn’t work. Then I even tried of putting the ground together of the audio and video-signals, so I had two pairs left on the UTP-cable. Now USB consists of four wires, two for power (a +5 volt and a ground) and two for data. That seemed to work for a while, but wasn’t stable… So I figured there were some strange things happening on that one UTP-cable I used, the videosignal had some extra distortion as well, so I decided to start all over with two UTP-cables and a total of eight pairs. Now we just used one UTP-cable for audio/video so we have one UTP-cable left for USB… I experimented with a lot of different ways of wiring the four USB-wires onto the eight wires of the UTP-cable, in the end I just used two pairs. I used one pair for the power and one pair (the green-white one of course!) for USB-data.

click to enlarge
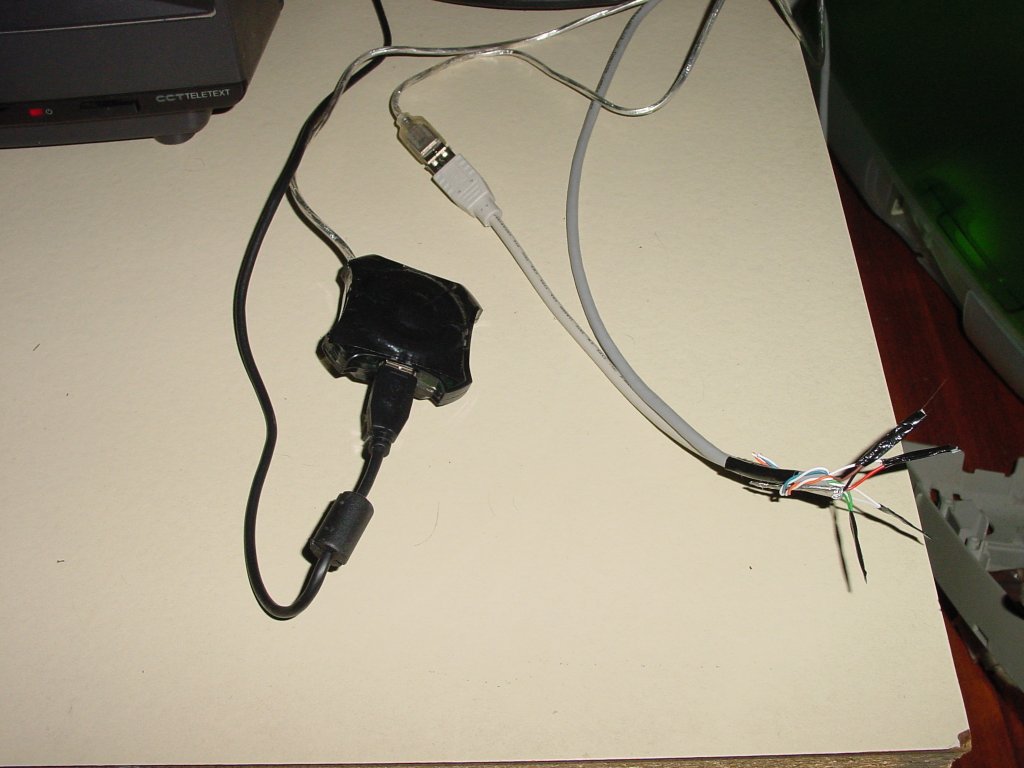
The USB-over-UTP-part in the bedroom.
Now with this extended cable with a USB-male in the livingroom and a USB-female in the bedroom you’d say it might all just work. I thought the same, but when I hooked it up, my Media Center gave me this:
click to enlarge

So I thought “well, let’s experiment with the powered hubs I got…” Now only when I put a hub on both sides of the just made cable, this works… But get this, this also works when I don’t use the poweradapter I got with these hubs… That somehow surprised me. Officially you can extend USB up to 5 meters before you need an amplification of some sort. That’s also why I bought two powered USB-hubs (there’s an adapter in the package). Now the length of the cable we use in between is much longer than 5 meters, in my case it’s about 20 meters (60 ft) and no matter how I think this through, it seems the amplification (or whatever this hub does to the datasignal) also works on just the 5 volts it gets from the PC itself. But even then, you should say I could leave the hub which is nearest to the Media Center, but without it, it still gives me the same ‘USB Device not recognized’-message, so two USB-hubs without power it is…
click to enlarge
In the bedroom it now looks like this, the USB-female side with a hub (without the power!) connected to it. To the hub I’ve connected the second IR-receiver.
click to enlarge
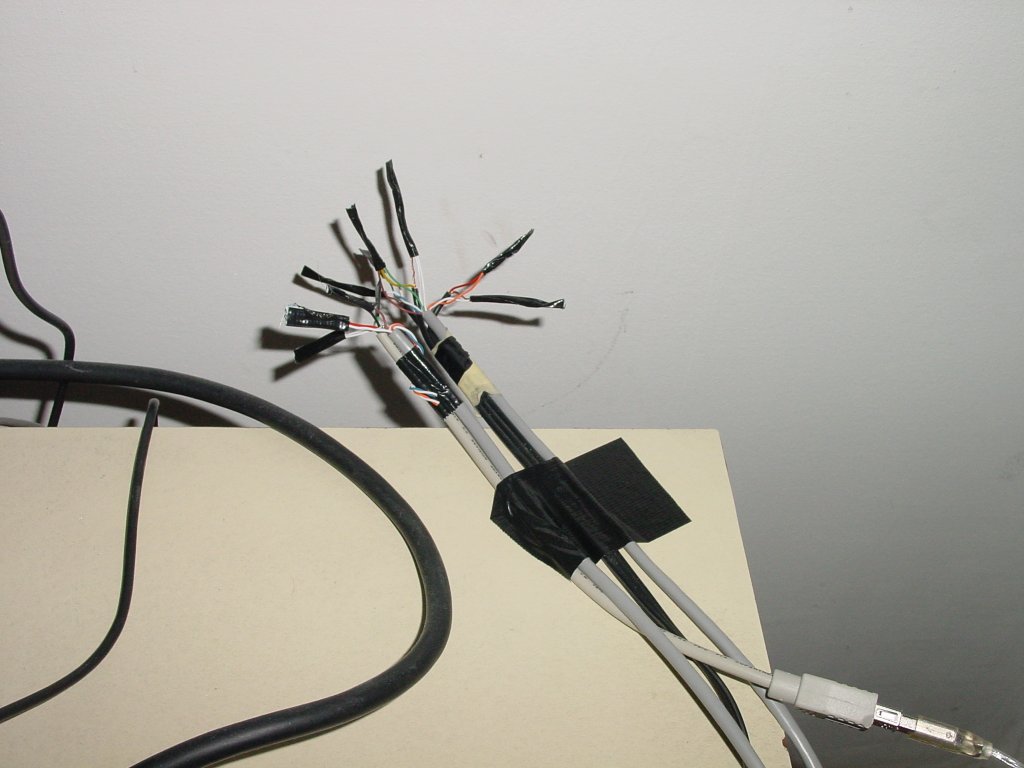
the home-made wiring in the bedroom…
click to enlarge
...and the same in the livingroom…
click to enlarge
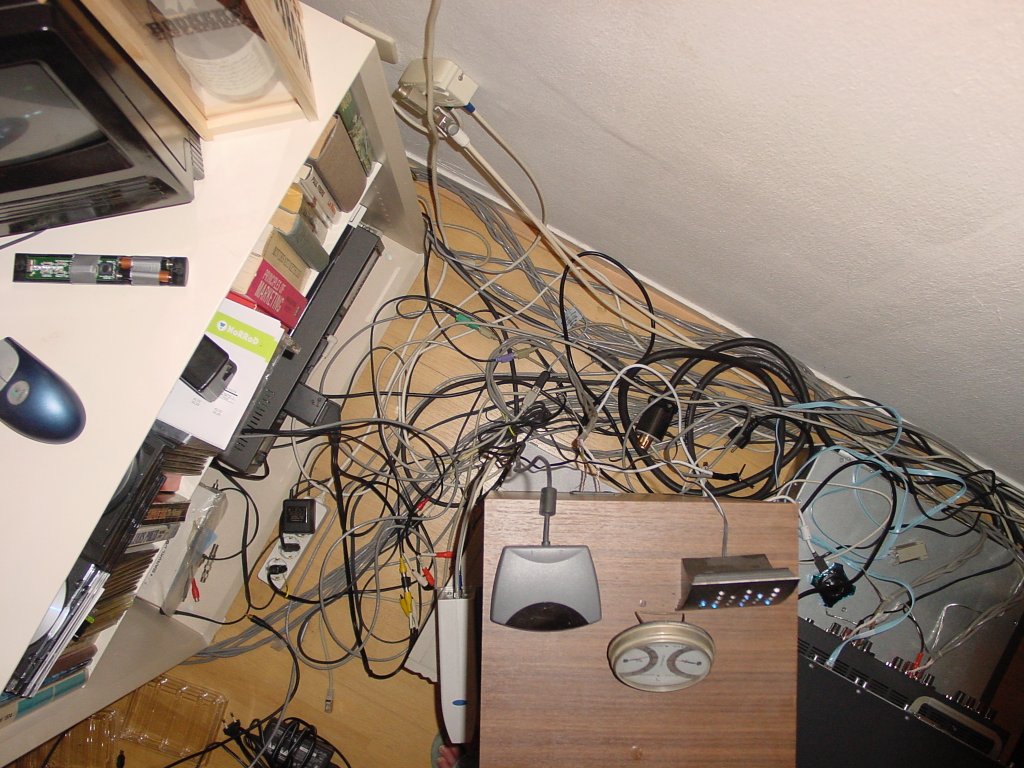
...and ahem… cables running behind my Media Center… When you think “That’s a lot of UTP-cable!”... Euhm, that’s right…
click to enlarge
But… in the end it just works! I can now control and watch my Media Center from my bedroom…
There’s only one but and that’s that MCE seems to have trouble of running along with two IR-receivers at the same time. As soon as I plug in ‘number two’, the first one stops responding, if I unplug it, ‘number one’ starts working again… So, my workaround now is to have IR-receiver number two in the bedroom unplugged from the hub. When I decide I wanna watch some TV or movies or whatever from my bedroom, I first need to plug in the receiver.
Well… for me personally this is now a workable solution, but I’d like to hear exxperiences from others as well. There’s still a lot room for improvement I guess, but for now, this just works! *^_^*
Message from Mark's family this site has been made static. This means that it will be no longer possible to comment on his ideas and projects, but that we all can continue to cherish his creativity.you can find all of my projects overhere


Mediamarkt sells a “mediacenter extender” package quite similar like this, all though i don’t remember if they extend the IR signal too. I personally use a xbox 360, which works quite well if you have the spare cash (orignally bought it for the games offcourse).
The microsoft remotes are sold seperately as OEM equipment and a fun fact is that they also work on the xbox 360.
interesting to hear how far you managed to get usb to go, (although your ir receiver is probabley 1/1.1 so its not as critical as something like a usb2 drive),, although i cant find much about uber long extensions usb data is balanced/twisted pair serial anyway,, hubs are probably my best bet like you say
there are some interesting 2.4 ghz wirless video senders with remote controll extension,,, they are in the au $100 range, that a ‘neat’ solution
or else there is the idea of sending and analog ir signal, uning a 3/5volt power source a ir detector and an ir emitor taped/glued in/onto your main ir receiver,,, or if your handy with a soldering iron then you make an active ir extender using an ir demodulator (three pin device costs a few dolars or can be salvaged from a vcr, ground, +5, and signal are the pins), and at the other end you have a 555 timer circuit running at 38/40khz to re modulate the remotes signal (an active ir extender is more sensitive, you would get mixed results from the basic analog version)
you know your going to far when you have to dedicte shelves to the coiled up cable running different places, and have them tied off there and there, cheap beats neat, and its always best if your using what you have siting around
i did a 9 meter extension on my mobile (hands free to where there is signal) in the same sort of way, viva la cable
I’ve been looking for a way of cheaply extending USB cables for a webcam project. Looking at this it might do what I want.
What make are the USB powered hubs that you used?
Regards,
Rob
This is VERY INTERESTING! I have a couple questions:
1) Why can’t you use USB 1.1 hubs which are much cheaper?
2) In the pic of the USB hub in the bedroom (1156.jpg), why do you have 2 USB cables? It looks like you have a full USB cable connected to the hub, and then another half USB cable that transforms into the UTP cable. Why not just have one half USB cable? One end goes into the hub and the other half transforms into the UTP cable.
3) How can this be done wirelessly?
Thanks!
Can you map out exactly what wires go to what (i.e.-USB to UTP and Composite to UTP). I am familiar with UTP wires, but not USB or Composite. CAn you map out which wire goes to which for the connections?
Thanks!
Can you map the actual wires you connected? (ie. – USB to UTP and Composite to UTP) I am familair with UTP wires, but not USB or composite. (Never had to take either of them apart! :-)
It would be nice to know which wire is tied to which wire for each connection.
Thanks!
I have made the media extender to the spec above except that I used a twisted pair for each of the usb wires, instead of just one cable. But I can’t get the “usb not recognised” to stop coming up. I have now plugged the power adapters in to the hubs, to see if that made a difference, but it hasn’t.
Any clues?
Thanks!
Hi Guy, this was very interesting toread.
For the USB, I’ve used this USB to Ethernet product, for another application but the end result is the same.
http://www.usbgear.com/computer_cable_details.cfm?sku=171632&cats=137&catid=137%2C140%2C120
For Aaron, I think you need to use each conductor so that the twists reduce noise, which is why they are twisted (more twists=less noise inducition).
When I made mine to put a webcam up on an antenna mast, I parallelled the colors from 2 pairs (blue & brown) for the +5, the 2 “whites” from the same 2 pair for gnd, then using orange and green parallelled same way for USB + and -.
Parallelling helps with voltage drops over long runs, and using the twists properly reduces noise.
FYI, I have about a 30 foot run, + the 6’ cam cable (hardwired into the cam). When I plugged into the PC, it found “something”, but didnt load. When I plugged into a powered hub… FOUND NEW HARDWARE—- CREATIVE WEB CAM, and VOILA! It works…..
Parfait!